
All About USB-C: Cable Types
USB-C cables and connectors: these are controversial topics, and rightfully so – I don’t want to pull any punches. I will also show you that things don’t have to be that bad for you, as long as you’re willing to apply a few tricks and adjust your expectations.
Wild West of Wiring
You might have a bunch of USB-C cables, and they all might look exactly the same, but you’ve likely experienced that they’re not the same internally, and often there’s not a label in sight. Yes, it’s pretty bad, and one could argue it’s getting worse.
I’d like to clarify that I’m only talking about USB C male – USB C male cables here. While cables like USB-A to USB-C are popular, they are quite simple; you get USB 2.0 or USB 3.0 data and 2 A of current at most, and the USB-C plug is usually hardwired as “host, will supply five volts”, which is defined by a pullup resistor. Also, while cables like “Type-C to DisplayPort” might look like cables at a glance, they are adapters with a meaningful amount of active circuitry in them.
Purely following the specification, there used to be six types of USB-C to USB-C cables out there. Then, it became eight. Now, I’m afraid, there’s twelve of them, purely following the spec, and there’s way more when counting all the out-of-spec cables. Good news is – for most of the time, majority of these cables will be suitable for simple tasks like charging and data transfer, and situations where you need a very specific cable are going to be rare enough. Still, let’s go through it, and you’ll see that they’re easier to tell apart than it might look.
Sorting Cables Into (Mental) Boxes
For a start, there are two variations of current capability – 3 A and 5 A, with 3 A being the bare minimum for any cable out there, and 5 A support being optional. Of course, as you would guess, the bargain bin cables might be undersized for even 3 A, but most cables will pass 3 A no problem. Last year, USB-C group introduced EPR, raising maximum voltage from 20 V to 48 V, and requiring changes to cables and connectors to increase isolation between power and data pins. That’s two more categories, SPR (20 V max) and EPR (48 V max). However, there are no 3 A EPR cables, so it’s a tiny bit less confusing than it sounds.
Then, there are at least four variations of data transfer speeds. It used to be that you’d have USB 2-only and USB 3-only Type C cables, as well as Thunderbolt-certified cables. Now, there’s a new USB 3 standard which wants higher speeds, and needs higher-specced cables. Plus, there’s active USB-C cables that put the signal through redrivers or fiber optics for achieving long-distance operation. If you thought there might just some cabling variability that introduces additional small permutations inside and outside the specification, you are, unfortunately, correct.
This gives us a three-by-four matrix of “which cable you might have on hand”. Three for 3 A, 5 A, or EPR 5 A, and four for cable speeds. There’s also plenty of blatantly out-of-spec cables out there – like charging-only cables without 2.0 pins, which is blasphemous as per USB specification. Of course, you can indeed buy these by accident, or intentionally. How do you figure out which ones you have? Let’s simplify the situation to the three-by-four case and mostly dismiss the exceptions – over time, the weird cables will become less and less prominent, as even bargain bin manufacturers will learn to keep it together.
The undeniable benefit of having so many cable variations is that you can actually buy a $5 USB-C cable when you only need $5 worth of capabilities, and a $40 cable when you need $40 worth. 2.0-cables are also thinner, lighter and more flexible – you really don’t want to use a Thunderbolt cable when you want to charge your laptop on the go. Plus USB-C has facilities to distinguish between different cables! Let me show you.
Your Cable Has A Computer In It… Almost
When a power supply is capable of providing more than 3 A over a cable, it won’t do that instantly – first, it will check that the cable can handle such a current, and that the device connected is able to accept it.
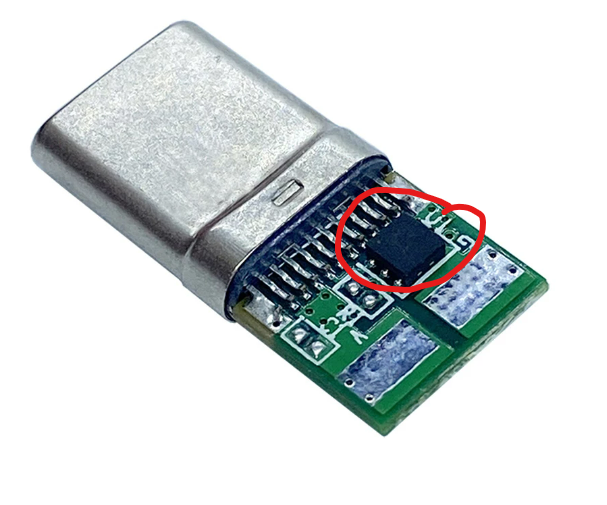
How does it check cable capability, exactly? By reading the cable’s “emarker”. An emarker is a memory chip inside the cable plug that encodes the cable capabilities and parameters, and taps into the CC channel in order to transmit them. It’s required for anything more than USB 3 speeds or 3A current, and there’s a myriad of parameters that could be encoded into an emarker, including even, ahem, country codes. Would you like to learn more? Here’s a programmable emarker (VL151) datasheet, it lists a ton of fun info you will be able to get out of an average emarker!
Checking The Cables Ourselves
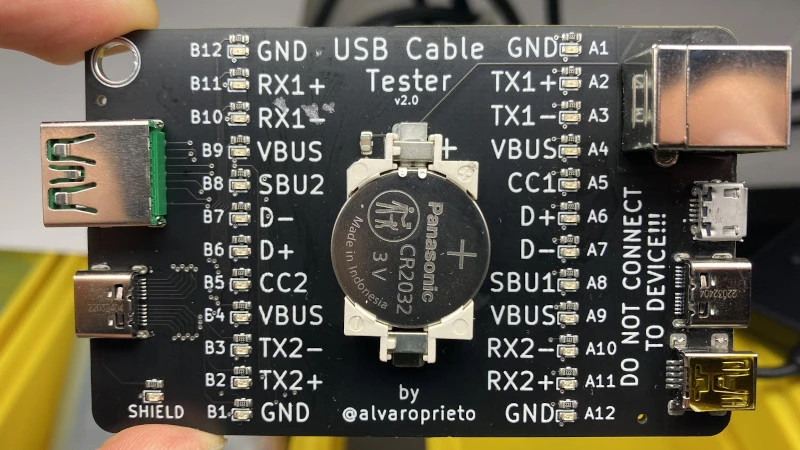
So you can check the cable capabilities by reading the emarker. Linux users might think that this information ought to have been available to you somewhere in /sys/, but apparently, there’s not all that much support for it yet – /sys/class/typec/ is empty on my Framework laptop with 6.0.3 kernel, even with a Type-C monitor plugged in. In the meantime, there’s USB-C testers that can read emarker information. Also, as this article series follows, I might just show you how to build an emarker reader yourself!
If an emarker is not present, you can assume USB 2.0 speeds and 3 A current support, but not necessarily much more than that. Apart from current carrying capability of the cable, the emarker can tell you whether the cable contains high-speed pairs, and what kind.
A USB-C cable is supposed to contain either no high-speed pairs, or four of them, in addition to the required USB 2.0 pair, of course. There are legal exceptions – if you have a USB-A to USB-C, USB 3-capable cable, it will contain only two pairs. And a USB-C to HDMI adapter with a hardwired (captive) cable is also likely to only have two pairs. Plus, in practice, I have a cable that came with my USB to M.2 NVMe enclosure that only contains two pairs. It will work for USB 3.0, but it won’t work for DisplayPort or such – it’s not long enough for that, anyway.
You can also test cables in vivo. If you use a 100 W charger and a 100 W laptop, you can easily check whether your cable is 100 W capable, just by plugging them together through a cheap USB-C power meter and seeing whether power consumption exceeds 3A. Same applies if you have a bunch of cables and you want to know if they do USB3 or beyond – and you also happen to have, say, a M.2 NVMe enclosure with a USB3-capable Type-C female port.
Given that, here’s a quick&dirty test – connect the enclosure to an USB-C-equipped laptop with a cable, then run lsusb -t, which will show the connection speed (480 for USB2 cables, and 5000/10000 for USB3-capable cables). As a bonus, you can check if any of your USB3 cables fail the reversibility test too – since, apparently, that’s still a problem.
Compensating For Lack Of Labels – Ourselves
Of course, the manufacturer knows the cable capabilities and exact internal structure when they build it. There are supposed to be labels, but there are hardly ever labels on the cables. Sometimes there are labels on the packaging, so, if you haven’t yet thrown it out, you might want to take note of what’s written on there – or revisit the store listing. Say, you have a cable without markings, and you’ve just determined what kind of cable it is. What do you do?

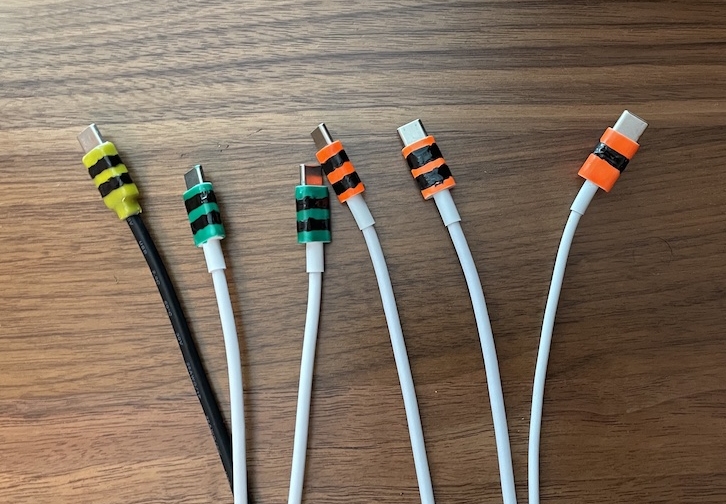
That said, USB-C started fixing things. They introduced a new labelling scheme that a lot of people laughed at. However, this new logo scheme is quite simple and makes sense. If a cable supports 40 Gbps, it will have the 40 Gbps logo on it. If the cable supports 240 W, it will have the 240 W logo on it. If it supports both, it will have both logos. You might not want to paint over these logos with nail polish, but I trust you to figure something out.
USB-C In Captivity
You might have seen devices, like docks, with short USB-C cables attached to them permanently – as opposed to having a female port on the dock, and using a male-male cable. This is called a “captive cable”. Captive cables actually don’t fall under the same rules, and the circuitry required for them is way simpler, which is why they’re used on cheap stuff so often.
In a penny-pinching arrangement of selling a highly featured USB-C dock on Aliexpress for $15, that just won’t do. As a result, many cheap devices will come with captive cables, which makes things both easier and harder. On the upside, you no longer have to worry about picking the right cable to connect such a device, and it’s more likely to be standards-compliant in a useful way, just because of how simple it is to implement a captive cable. On the downside, you’re limited to the cable that’s soldered into the device, and it breaks, the whole device breaks. Also, you can’t quite extend it. Or can you?
Let’s talk about extensions the next time, as well as other kinds of USB-C cables that might or might not be specification-legal. For now, here’s something to remember – cables are meant to be easy to replace. If a cable is no longer your friend, or it’s being weird – slap a mark of shame onto it, put it somewhere you won’t be tempted to use it, and order a replacement; better yet, a few replacements. Just like with MicroUSB cables, replacing them is the primary way to make most of your cable problems disappear.


